思考:为何登录失败自动跳转到/login?error,而且没有异常提示?
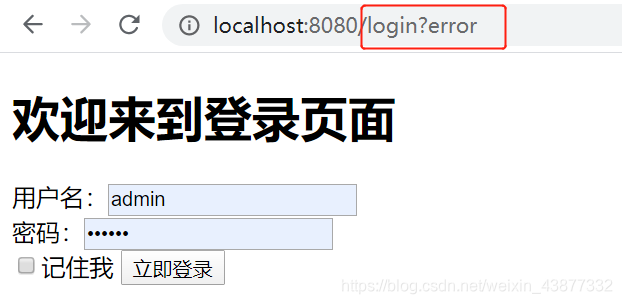
因为首先 /login?error 是 Spring security 默认的失败 Url,其次如果你不手动处理这个异常,这个异常是不会被处理的。
一、常见异常
我们先来列举下一些 Spring Security 中常见的异常:
UsernameNotFoundException(用户不存在)DisabledException(用户已被禁用)BadCredentialsException(坏的凭据)LockedException(账户锁定)AccountExpiredException(账户过期)CredentialsExpiredException(证书过期)- …
以上列出的这些异常都是 AuthenticationException 的子类,然后我们来看看 Spring security 如何处理 AuthenticationException 异常的。
二、源码分析
我们知道异常一般在过滤器中处理,在 AbstractAuthenticationProcessingFilter 中我们找到了对 AuthenticationException 的处理:
org.springframework.security.web.authentication.AbstractAuthenticationProcessingFilter#doFilter

		try {
			authResult = attemptAuthentication(request, response);	//1.认证
			if (authResult == null) {
				return;
			}
			sessionStrategy.onAuthentication(authResult, request, response); //2.并发问题
		}
		catch (InternalAuthenticationServiceException failed) {
			logger.error(
					"An internal error occurred while trying to authenticate the user.",
					failed);
			unsuccessfulAuthentication(request, response, failed);
			return;
		}
		catch (AuthenticationException failed) {
			unsuccessfulAuthentication(request, response, failed);//3.认证失败
			return;
		}
(1),先是调用attemptAuthentication()方法对请求参数进行提取
org.springframework.security.web.authentication.UsernamePasswordAuthenticationFilter#attemptAuthentication

	public Authentication attemptAuthentication(HttpServletRequest request,
			HttpServletResponse response) throws AuthenticationException {
		if (postOnly && !request.getMethod().equals("POST")) {
			throw new AuthenticationServiceException(
					"Authentication method not supported: " + request.getMethod());
		}
		String username = obtainUsername(request);
		String password = obtainPassword(request);

		if (username == null) {
			username = "";
		}
		if (password == null) {
			password = "";
		}
		username = username.trim();
		UsernamePasswordAuthenticationToken authRequest = new UsernamePasswordAuthenticationToken(
				username, password);
		// 设置“details”属性
		setDetails(request, authRequest);
		//认证
		return this.getAuthenticationManager().authenticate(authRequest);
}我们来看看setDetails(request,authRequest)做了些什么:
protected void setDetails(HttpServletRequest request,
		UsernamePasswordAuthenticationToken authRequest) {
	authRequest.setDetails(authenticationDetailsSource.buildDetails(request));
}
UsernamePasswordAuthenticationToken是Authentication的具体实现,所以这里实际上就是在设置details,至于details的值,则是通过authenticationDetailsSource来构建:
public class WebAuthenticationDetailsSource implements
		AuthenticationDetailsSource<HttpServletRequest, WebAuthenticationDetails> {

	public WebAuthenticationDetails buildDetails(HttpServletRequest context) {
		return new WebAuthenticationDetails(context);
	}
}这里我们也就知道buildDetails方法返回的其实是一个WebAuthenticationDetails对象,而WebAuthenticationDetails对象默认有哪些属性呢?
public WebAuthenticationDetails(HttpServletRequest request) {
	this.remoteAddress = request.getRemoteAddr();

	HttpSession session = request.getSession(false);
	this.sessionId = (session != null) ? session.getId() : null;
}如果我们想保存更多关于Http请求的信息,可以通过自定义WebAuthenticationDetails来实现,同时WebAuthenticationDetailsSource也要一起重新定义。
接下来进入到org.springframework.security.authentication.ProviderManager#authenticate方法中:
public Authentication authenticate(Authentication authentication)
			throws AuthenticationException {
		Class<? extends Authentication> toTest = authentication.getClass();
		AuthenticationException lastException = null;
		AuthenticationException parentException = null;
		Authentication result = null;
		Authentication parentResult = null;
		boolean debug = logger.isDebugEnabled();
		//逐个遍历AuthenticationProvider,并调用他们的authenticate方法来做认证:
		for (AuthenticationProvider provider : getProviders()) {
            //首先要判断当前的AuthenticationProvider是否支持对应的Authentication
			if (!provider.supports(toTest)) {
				continue;
			}
			if (debug) {
				logger.debug("Authentication attempt using "
						+ provider.getClass().getName());
			}
			try {
                //实际验证交给AuthenticationProvider来处理
				result = provider.authenticate(authentication);

				if (result != null) {
					copyDetails(authentication, result);
					break;
				}
			}
            //如果验证过程中有异常,就会被捕获
			catch (AccountStatusException | InternalAuthenticationServiceException e) {
				prepareException(e, authentication);
				throw e;
			} catch (AuthenticationException e) {
				lastException = e;
			}
		}
(2),调用 attemptAuthentication方法走完认证流程之后,回来之后,接下来就是调用 sessionStrategy.onAuthentication方法,这个方法就是用来处理 session的并发问题:
org.springframework.security.web.authentication.session.ConcurrentSessionControlAuthenticationStrategy#onAuthentication

public void onAuthentication(Authentication authentication,
			HttpServletRequest request, HttpServletResponse response) {
		//1.获取当前用户的所有 session,该方法在调用时,传递两个参数,一个是当前用户的 authentication,
		//另一个参数 false 表示不包含已经过期的 session(在用户登录成功后,会将用户的 sessionid 存起来,
		//其中 key 是用户的主体(principal),value 则是该主体对应的 sessionid 组成的一个集合)。
		final List<SessionInformation> sessions = sessionRegistry.getAllSessions(
				authentication.getPrincipal(), false);
		//接下来计算出当前用户已经有几个有效 session 了,同时获取允许的 session 并发数。
		int sessionCount = sessions.size();
		int allowedSessions = getMaximumSessionsForThisUser(authentication);
		//如果当前 session 数(sessionCount)小于 session 并发数(allowedSessions),则不做任何处理
		if (sessionCount < allowedSessions) {
			return;
		}
		//如果 allowedSessions 的值为 -1,表示对 session 数量不做任何限制。
		if (allowedSessions == -1) {
			return;
		}

		if (sessionCount == allowedSessions) {
			HttpSession session = request.getSession(false);

			if (session != null) {
				// 只有当这个请求与一个已经注册的会话相同时才允许它
				for (SessionInformation si : sessions) {
					if (si.getSessionId().equals(session.getId())) {
						return;
					}
				}
			}
		}
		//首先会有 exceptionIfMaximumExceeded 属性,这就是我们在 SecurityConfig 中配置的 maxSessionsPreventsLogin 			的值,默认为 false,如果为 true,就直接抛出异常,禁止新的登录(参照微信),如果为 false,则对 sessions 					按照请求时间进行排序,然后再使多余的 session 过期即可(参照QQ)。
		allowableSessionsExceeded(sessions, allowedSessions, sessionRegistry);
	}
配置文件如下:
@Bean		//1
HttpSessionEventPub1isher httpSessionEventPub1isher(){
	return new HttpSessionEventPub1isher();
}

//关闭CRSF跨域
        http.csrf()
                .disable()
                .sessionManagement()
                .maximumSessions(1)
                .maxSessionsPreventsLogin(true);
为什么要加这个Bean呢?因为在Spring Security中,它是通过监听session的销毁事件来及时清理session的记录的,用户从不同的浏览器登录后,都会有对应的session,当用户注销登录之后,session就会失效,但是默认的失效是通过调用StandardSession#invalidate方法来实现的,这一失效事件无法被Spring容器感知到,进而导致当用户注销登录之后,Spring Security没有及时清理会话信息表,以为用户还在线,进而导致用户无法重新登录进来。
为了解决这一问题,我们提供了一个HttpSessionEventPublisher,这个类实现了httpSessionListener接口,在该Bean中,可以将session创建以及销毁的事件及时感知到,并且调用Sprign中的事件机制将相关的创建和销毁事件发布出去,进而被Spring Security感知到。
(3),当用户登录失败时,被异常捕获,转到 unsuccessfulAuthentication() 方法中,然后转交给了 SimpleUrlAuthenticationFailureHandler 类的 onAuthenticationFailure() 处理。
protected void unsuccessfulAuthentication(HttpServletRequest request, HttpServletResponse response, AuthenticationException failed) throws IOException, ServletException {
    SecurityContextHolder.clearContext();
    if (this.logger.isDebugEnabled()) {
        this.logger.debug("Authentication request failed: " + failed.toString(), failed);
        this.logger.debug("Updated SecurityContextHolder to contain null Authentication");
        this.logger.debug("Delegating to authentication failure handler " + this.failureHandler);
    }

    this.rememberMeServices.loginFail(request, response);
    this.failureHandler.onAuthenticationFailure(request, response, failed);
}
在 onAuthenticationFailure() 中,首先判断有没有设置 defaultFailureUrl。
- 如果没有设置,直接返回 401 错误,即
HttpStatus.UNAUTHORIZED的值。 - 如果设置了,首先执行
saveException()方法。然后判断forwardToDestination,即是否是服务器跳转,默认使用重定向即客户端跳转。
org.springframework.security.web.authentication.SimpleUrlAuthenticationFailureHandler#onAuthenticationFailure

	public void onAuthenticationFailure(HttpServletRequest request,
      HttpServletResponse response, AuthenticationException exception)
      throws IOException, ServletException {

   if (defaultFailureUrl == null) {
      logger.debug("No failure URL set, sending 401 Unauthorized error");
      response.sendError(HttpStatus.UNAUTHORIZED.value(),
         HttpStatus.UNAUTHORIZED.getReasonPhrase());
   }
   else {
      saveException(request, exception);//判断是转发还是重定向
	  //直接转发
      if (forwardToDestination) {
         logger.debug("Forwarding to " + defaultFailureUrl);

         request.getRequestDispatcher(defaultFailureUrl)
               .forward(request, response);
      }
      else {//重定向
         logger.debug("Redirecting to " + defaultFailureUrl);
         redirectStrategy.sendRedirect(request, response, defaultFailureUrl);
      }
   }
}来到org.springframework.security.web.authentication.SimpleUrlAuthenticationFailureHandler#saveException方法
protected final void saveException(HttpServletRequest request,
			AuthenticationException exception) {
		if (forwardToDestination) {
			request.setAttribute(WebAttributes.AUTHENTICATION_EXCEPTION, exception);
		}
		else {
			HttpSession session = request.getSession(false);

			if (session != null || allowSessionCreation) {
				request.getSession().setAttribute(WebAttributes.AUTHENTICATION_EXCEPTION,
						exception);
			}
		}
	}
在 saveException() 方法中,首先判断forwardToDestination,如果使用服务器跳转则写入 Request,客户端跳转则写入 Session。写入名为 SPRING_SECURITY_LAST_EXCEPTION ,值为 AuthenticationException。
至此 Spring security 完成了异常处理,总结一下流程:
–> AbstractAuthenticationProcessingFilter.doFilter()
–> AbstractAuthenticationProcessingFilter.unsuccessfulAuthentication()
–> SimpleUrlAuthenticationFailureHandler.onAuthenticationFailure()
–> SimpleUrlAuthenticationFailureHandler.saveException()
三、处理异常
上面源码说了那么多,真正处理起来很简单,我们只需要指定错误的url,然后再该方法中对异常进行处理即可。
(1)指定错误url,WebSecurityConfig 中添加 .failureUrl("/login/error")
protected void configure(HttpSecurity http) throws Exception {
    http.authorizeRequests()
            .anyRequest().authenticated()
            .and()
            .formLogin().loginPage("/login")
            //登录失败url
            .failureUrl("/login/error")
            //登录成功url
            .defaultSuccessUrl("/").permitAll()
(2)在 Controller 中处理异常
@RequestMapping("/login/error")
public void loginError(HttpServletRequest request, HttpServletResponse response) {
    response.setContentType("text/html;charset=utf-8");
    AuthenticationException exception =
            (AuthenticationException)request.getSession().getAttribute("SPRING_SECURITY_LAST_EXCEPTION");
    try {
        response.getWriter().write(exception.toString());
    }catch (IOException e) {
        e.printStackTrace();
    }
}
我们首先获取了 session 中的 SPRING_SECURITY_LAST_EXCEPTION 。为了演示,我只是简单的将错误信息返回给了页面。运行程序,当我们输入错误密码时:

来到我们自己设置的错误页面,显示我们设置的错误信息。
本博客所有文章除特别声明外,均采用 CC BY-SA 4.0 协议 ,转载请注明出处!